Oremus Home     e               Labarum Home

The Royal Army Chaplains' Department


 Resources for Common Worship and Common Witness

 Raising the Standard of Liturgical Practice


Technical information follows these historical notes


In This Sign Conquer


In Hoc Signo Vinces


Blessed God, 

who has committed the glorious Gospel to our trust, 

have mercy upon the Royal Army Chaplains' Department 

and grant that we may never glory 

save in the Cross of our Lord Jesus Christ, 

but in all things may approve ourselves as your ministers, 

through the same your Son Jesus Christ our Lord.  Amen.


The Collect of the Royal Army Chaplains' Department.


si5xt04.jpg


si5xt11.jpg

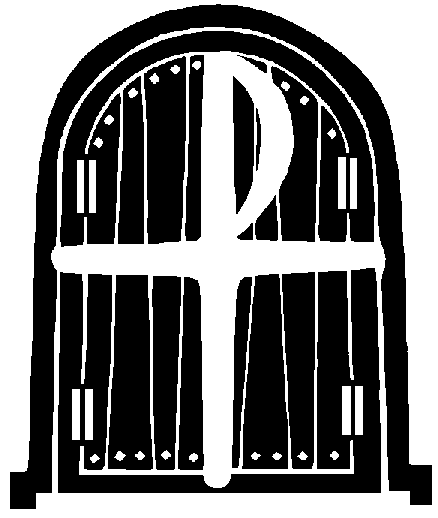
The Labarum of Constantine 
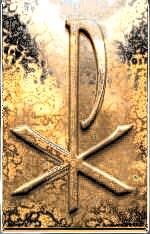
or Chi-Rho

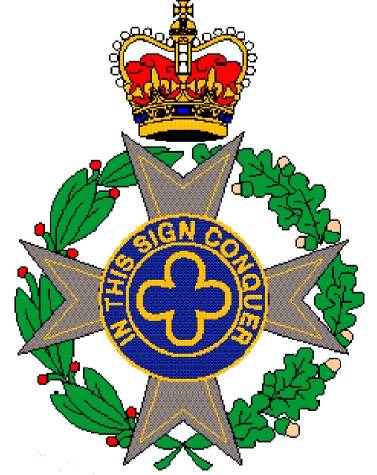
Labarum is the name by which the military standard adopted by Constantine the Great after his celebrated vision (Lactantius, "De mortibus persecutorum", 44), was known in antiquity. The original labarum, designed under the emperor's direction on the day subsequent to the appearance of the "cross of light", is described by Eusebius (Vita Constant., I:26) as "a long spear, overlaid with gold", which with a transverse bar formed the figure of a cross. "On the top of the whole was fixed a wreath of gold and precious stones, and within this the symbol of the Saviour's name, two letters indicating the name of Christ by means of the initial letters, the letter X intersection P at the centre." These two letters formed what is known as the monogram of Constantine, so called -- not because it was the invention of this emperor, for it had been a familiar Christian symbol prior to his conversion -- but because of the great popularity it enjoyed from the date of its appearance on the imperial standards. From the cross-bar of the spear, was suspended a purple banner with the Greek inscription TOUTO NIKA -- i. e. conquer by this (sign), usually rendered in Latin "In hoc signo vinces" - "In this sign conquer", the motto of the Royal Army Chaplains' Department.  
           This banner, square in form, covered with a rich embroidery of precious stones, and "being also richly interlaced with gold, presented an indescribable degree of beauty to the beholder". The part of the staff immediately above the embroidered banner was adorned with medallions of the emperor and his children. The monogram was often enhanced with and Alfa-Omega, the first and last letters of the Greek alphabet signifying Christ the beginning and the end.
           Fifty soldiers of the imperial guard, distinguished for bravery and piety, were entrusted with the care and defence of the new sacred standard (Vita Constant., II:8). Standards, similar to the original labarum in its essential features were supplied to all the legions, and the monogram was also engraved on the soldiers' shields. An idea of some of the deviations in form of the standards furnished to different divisions of the army may be obtained from several coins of Constantine's reign still preserved. On one coin, for instance, the portrait of the emperor and his sons are represented on the banner instead of on the staff; on a second the banner is inscribed with the monogram and surmounted by the equal-armed cross, while the royal portraits, though on the shaft, are below instead of above the banner. In form, the labarum of Constantine was an adaptation of the already existing cavalry standard of the Roman army; the pagan emblems were merely replaced by Christian symbols. The term labarum, which is of uncertain derivation, was probably familiar in the Roman army from the reign of Hadrian.

From the Catholic Encylopedia 
MAURICE M. HASSETT        Transcribed by Michael C. Tinkler
www.newadvent.org/cathen/08717c.htm


The Royal Army Chaplains' Department

 Resources for Common Worship and Common Witness

 Raising the Standard of Liturgical Practice


Introduction


These texts are drafts of services presented ready for printing. They are from Common Worship and from the Liturgical Books of the other "Sending Churches" of the Royal Army Chaplains' Department (RAChD). They may be used by Chaplains, and by others, within constraints imposed by copyright law.


Read the Liturgical Copyright Guide and see  http://cofe.anglican.org/commonworship/


Production Format

 
    These services are produced in four production formats:

1. A single A4 Card  - Portrait, two columns, 11pt text size 
   - big font, but can be awkward to hold.


2.A single A4 Card.- Landscape, three columns, 10pt 
– size fine for the young – easy to hold.


3.A folded A5 Booklet – nice to use, but more difficult and more expensive to make.
The A5 booklet is set at 11.5pt or 12 pt - use a photocopier to increase it to an A4 (folded A3) booklet, and an Altar Book is produced. Reduction to A6 (folded A5) produces a pocket booklet which is still very readable.


4. A "Longbook" - a long narrow booklet. An A4 sheet is folded vertically to form a booklet that does not fall off the narrow pew shelf. This format is modelled on a style from www.xpeastbourne.org


For Common Worship material no original should be used to generate more than 500 copies unless special permission is sought. 


All texts should have the name of the church inserted before they are reproduced locally.


They then be come new documents. 


Read the Liturgical Copyright Guide and see  http://cofe.anglican.org/commonworship/


Booklets for local use 


Advice for those looking for a quick solution.


Before you look too carefully at other people's ideas you make sure that you have some sort of list of your own particular criteria which apply to your context. These might include such issues as: 


- whether children will use the same books as the adults


- whether you have a large proportion of people for whom a larger print size would be an advantage


- whether it will be important to include illustrations/images (and how much room to allow for them) 


- whether your congregation (and visitors) are more likely to be helped by something that looks as simple and short as possible (with just congregational texts, for instance) or by something in which the congregation have all or most of the words spoken by the minister, as well as their own words etc, etc.


This is very important: otherwise, the temptation is to follow someone else's beautiful design, which is right for their context but not necessarily for yours. For instance, when leading training sessions about designing orders of service I often show examples which are pretty stunning (beautiful card covers on booklets printed on top quality paper, reproduced on professional quality laser or photocopier) - many in the group will be impressed, and then someone will say something like 'That looks great: but if we used that in my parish visitors (and regulars) would just think that we had been wasting money that we should have been spending on the Sunday School [or whatever]... ' - in other words, in some contexts it would be TOO impressive and something good, but not extravagant, would be more appropriate. This is the whole point of being able to produce our own orders of service: to make sure they fit particular needs and particular mission contexts.


That shouldn't stop you cribbing other people's ideas if they will work for you - it just means making sure that your Common Worship working party doesn't stop at considering the text alone: so many other factors come into play...!


A Quote from     Mark Earey

                           One time Praxis National Education Officer

                           www.sarum.ac.uk/praxis/


Download Instructions


Text files are available in MSWORD 97/2000, Rich Text Format, and Star Office 5.2  or 6 (Open Office 6)for Windows. Some files are in Tables are compressed in ZIP format, so you will need a copy of WINZIP on your PC. For a copy of WINZIP try www.zdnet.com - or more precisely here


Provided WINZIP is correctly installed clicking all the obvious buttons will result in a text loaded into your chosen Word Processor. If you have never loaded a Rich Text Format File before you may be asked to choose the program to open it - choose the word-processor, not a Windows Text Editor.


Limitations


The native format of most of these these documents is STAR OFFICE 5.2 for WINDOWS, although some are edited with Star Office (Open Office) version 6 or 7, and some are drafted in MS WORD 2000. There is a lack of consistency in this collection because many of the files were created for local use in a particular situation and then converted for general use before uploading to Labarum.


The MICROSOFT  RICH TEXT FORMAT (.RTF) and MS WORD 97/2000 (.DOC) files cannot be guaranteed to format or paginate correctly, and should be carefully checked. With complex layouts there can be problems even reading a document on a copy of the program that wrote the file. This is because the layout can vary significantly depending on the printer-driver loaded. You may open a document that starts with a blank page - look more closely - it is probably all there. The three column layout of the fan-fold cards is particularly fragile. Note that the Service begins at the top of the third column of the first page and ends at the bottom of the second column of the first page.


The earlier documents in  WORD, RTF and STAR OFFICE format are found in the Tables and are compressed in ZIP format. For a copy of WINZIP try www.zdnet.com - or more precisely here


Problems with Inkjet Printers

It may prove difficult to get the text properly positioned if you are not using a laser printer. Inkjet printers cannot print as close to the bottom of the A4 (portrait) sheet as laser printers. In landscape mode the layout may be displaced sideways - the problem may also affect the Acrobat (PDF) files. Some of the latest inkjet printers have overcome this limitation,  but the feature needs to be turned on in the printer control software. 


Adobe Acrobat 


An ADOBE ACROBAT distribution is often available. These files have the extension .pdf - Portable Document Format.  It does not suffer from the problems of other formats, but it cannot easily be edited. You take it or leave it! It should produce identical layout on any system. The pages will be in the correct order to make a booklet.  The download time can be 30 seconds, or more for the largest booklets, so do be patient.


An Adobe Acrobat Reader version 4 or later is required to read and print these files which have a .PDF extension.  The reader is free from   http://www.adobe.com/products/acrobat/alternate.html


Booklet Printing


Booklet printings is perhaps the most difficult technical problem encountered in the production of liturgical material. 


Star Office was chosen for much of this work because it is free, and will format folded booklets automatically. WordPerfect, Lotus WordPro and some other word-processors can do this, but MS WORD before Office XP cannot. Desktop Publishing Packages will also print booklets, but they increase the complexity of the operation unnecessarily. Most programs sort out the page layout once the document is complete, but Word XP requires that a booklet be specified as the page layout option before the document is started.


Star Office is, no longer free, but an almost identical program, Open Office is free for download from www.openoffice.org  It may take an hour or more with a 56K Modem so you may be wise to install a download manager before attempting it. This will allow the download to resume automatically if the  modem drops out. Try this download manager: www.speedbit.com, it is one of many. Open Office installs in Windows very easily. It will read and write MS Word files and will do all that most folk need.


Some booklets will print at A4 size from the WORD and RTF files - from the STAR files too, unless you use the "PRINT - BROCHURE" option. Without a brochure or booklet printing routine you will end up with an A4 Altar Book size using 17pt.  Star (or Open) Office reduces and rotates the pages, laying them two to an A4 sheet in the right order for reproduction. A utility such as www.clickbook.com will do the same for MS Word and other programs – but it costs money!


This trick is offered by one of the Visual Liturgy Staff:


Word 2000  (though not Word 97) is fine for booklets provided 2 pages per sheet is enough. 

Go to Print, and in the dialogue box set the 2 pages per sheet option.

Go to the Page Range section of the Print Control dialogue box. and specify the order in which the pages are printed on the A4 sheets.

For an 8 page booklet (2 sheets of A4)

Set print pages 4,5,2,7  - you must enter it just like that with a comma between each page number.

Now take all the pages, turn the the lot over and replace them in the printer tray to print the other side.

Print pages 8,1,6,3.


You still have to work out for yourself the order of printing, and it can get very complicated for bigger booklets.


More on Booklet Printing


From the Daily Telegraph Bootcamp Series 


Bootcamp 121: booklet printing, part 1
(Filed: 27/11/2002)


Recently in Faqs! Facts! Fax! we tackled a question about creating booklets using Microsoft Word; we still get a steady stream of enquiries about that item so we thought it was about time we took a closer look at this apparently straightforward task. Word is the world's most popular word processor program and it can do lots of clever things but one thing it cannot do, at least not easily, is print booklets.

In fact it is quite a tricky business; judge for yourself. Take three sheets of A4 paper and fold them in half to produce a 6-page A5 sized booklet. Number the pages, with page 1 facing the inside front cover, and so on. Unfold the sheets and you'll see that the numbering is all over the place, and to make matters even more complicated, it's on both sides of the paper.

It can be done with Word, but it has to be said that it's a lot easier with other word processors like Lotus Word Pro and DTP programs such as Serif Page Plus. If you are wedded to Word there are several add-on printing utilities you can buy that that make the whole thing a lot easier, we'll consider the alternatives in part 2, next week.

Before we begin a few words on printing methods. By all means use your inkjet or laser printer if you only intend running off half a dozen or so copies of your booklet, but any more and it will be quicker and cheaper to use a photocopier, that is until you get to 100 or more copies, at which point you would be well advised to get a quote from a local print shop.

Have all of the text and graphics files you'll be using ready and make a layout dummy, - as before with sheets of A4 paper - marking page numbers and roughly where you want everything to go. Next, configure Word; select Page Layout (Word 97) or Print Layout (Word 2000) on the View menu. Now go to the File menu and Page Setup, on the Paper Size tab select Landscape. On the drop-down menu next to the 'Zoom' setting on the toolbar select Two Pages. The desktop should now show a single page, in landscape view, with a flashing cursor. To force Word to display more pages press and hold the Return key and additional pages appear on the screen. You need to display twice the number of A4 pages you'll be using, representing both sides of each sheet. In other words, if you are making a 12-page A5 booklet - made up of 3 sheets of A4 - you need to create 6 blank pages.

The next step is to create boxes to put the text in. You need two per side (four per sheet). Increase the zoom size to 50% or 75%, (or set the size manually, to show one side of A4 at a time). Call up the Drawing toolbar, (if it's not displayed right-click into an empty area next to a toolbar and select it from the list) and click on the Text Box icon. The cursor turns to a crosshair, position it in a corner of the first sheet then click and drag a box to fill approximately half of one side of the page. Use the sizing handles to adjust and position the box. Leave borders top and bottom, for headings or page numbers, and plenty of room in the middle of the page for the fold or 'gutter'.

When you are happy with it move the cursor to the shaded edge of the box, until it changes to a cross with arrows, click and hold, press Ctrl, the cursor changes to a '+' sign then drag an exact copy of the box to the other side of the page. Line the second box up and repeat the copy procedure as many as necessary to put pairs of text boxes on every page. (You may find this easier with the zoom setting on Two Pages). Next, insert text boxes for page numbers, refer to your layout dummy and work in sequence, starting with the outside front and back cover. On a 12 page booklet the next 'spread' would be numbered 1 and 8, followed by 6 and 3 then, working back out to the covers, 4 and 5, 2 and 7 and finally the inside front cover and page 9. It's easier to create one page number box per sheet, type in the number, drag and drop a copy (click and hold the Ctrl key) and change the number.

Open your text file and copy it to the Clipboard, return to your blank booklet layout, click into page 1 to highlight the box. Select Paste or Ctrl + V and the box fills with text; click on the chain symbol on the Text Box tool bar, the cursor changes to a pouring jug icon, move it to your page 2 text box, click the mouse and the next section of text flows into the space; repeat and fill all of the pages in sequence. 'Linked' text boxes behave exactly like ordinary pages in a document, so you can edit and modify your layout as you please. Do a test print, to check page numbering and make sure everything lines up. You can change or get rid of the border around text boxes using the Line Colour and Line Style commands on the Drawing toolbar (set line colour to white for no border).

If you are photocopying print out all of the sheets as is and use them as your 'masters'. To print the booklet directly use the Print command on the File menu, in the Page Range option box select the page numbers for the first half of the job then, load them back into the printer, not forgetting to face them the other way around, and print the second batch of pages on the back. All that remains is to compile, staple, fold and distribute your masterwork.


Bootcamp 122: booklet printing, part 2
(Filed: 27/11/2002)


Last week we showed how with a little cajoling, Microsoft Word could be persuaded to print an A5 booklet. As we suggested there are easier ways of doing it, including using other word processing and desktop publishing (DTP) software, which we'll come to shortly, but we'll begin this week with quick look at a couple of utilities that can make Word -and most other word processors and Windows applications - a lot more booklet friendly.

The programs in question are FinePrint 2000 and ClickBook 2000; trial versions can be downloaded from various sites on the Internet, so you can try them out for yourself (see Contacts for details of the publisher's home pages). Both programs are independent of Word, in other words you prepare your text and documents in the usual way, the utilities only come in to play when you get to the printing stage. In both cases the procedure is the same, select Print on Word's File menu and choose the utility program from the list of printer names installed on your PC, or the program can be set as the default. This opens a dialogue box, you set your preferences and the program takes control of page setup, layout and collating sheets for double-sided printing or single-sided photocopying. (See last week's Bootcamp for a more detailed explanation of the mechanics of booklet printing).

FinePrint is the simpler of the two programs, it has 6 pre-set layouts and it comes with an interesting assortment of 'stationery' options, these include clipart designs, watermarks or stamps like Urgent or Top Secret plus a range of header and footer options. Booklet printing is set to automatic 'duplex' or double-sided printing by default - a trick few SoHo printers can manage - but it can be easily changed to manual duplex printing, which entails the user waiting for the printer to print on the first sides of the document, then manually re-load the sheets so the other sides can be printed The demo version of FinePrint is limited to layouts with a maximum of 8 pages and it tags every page with 'Printed with FinePrint. . .' the full program can be paid for registered and unlocked on-line for $39.95.

ClickBook is very versatile and includes 8 design categories (books, brochures, cards, organisers, CD-ROM jewel case inserts etc.) covering more than 40 different types of layout. It's almost a mini desktop publishing application in its own right, booklet printing is only one of its talents and there are many style and design options, including the facility to generate a table of contents, add page numbers, lines, borders and rules. Operation is perfectly straightforward, and the job of double-sided printing is made a little easier as ClickBook generates a guide sheet, that tells you when and how to re-load printed sheets for a second pass through the printer. A time limited (5-days) trial version, that also labels each page with the ClickBook name, is available from the Blue Squirrel web site, full functionality can be unlocked on-line for $49.95.

The majority of word processors are like Word and make fairly heavy weather of booklet printing; one of the few exceptions is Lotus WordPro, which has a ready prepared template or 'SmartMaster', designed to help the user through the design and layout stage. The SmartMaster wizard starts whenever WordPro is opened, or it can be called up from the File menu, however on some versions booklet printing option is not listed on the main menu and we suspect some users may not even know they have it. To find it click on 'Browse for more Files'. Whilst it is reasonably easy to use it is well worth perusing the Help files on the subject and it may be necessary to configure some printers manually. A time-limited trial version of WordPro is available from the Lotus web site.

Booklet printing seems like an obvious application for desktop publishing software, though surprisingly not all DTP programs have it, and that includes some of the top-name pro packages. It's worth checking through any freebie or 'lite' versions of DTP or design and print programs you may have, which are routinely bundled with a lot of printers, scanners and PCs these days. Serif PagePlus is pone of the most popular DTP applications on the market; shareware versions also appear regularly on PC magazine cover discs. PagePlus can certainly do the job, but like so many programs the option is well hidden. It can be found by pressing the Options button on the Print dialogue box on the File menu. It's not as intuitive as some of the other programs and it may require a few trial runs to get the page layout right but with a little practice it's capable of good results. However, the advantage of using a DTP program, as opposed to a word processor or printing utility is the greater flexibility when dealing with illustrations, images and text.


All the Bootcamp articles are worth consulting for technical advice on PC use. Go to the main Telegraph site and look in the "Connected" section. Hunt for the Bootcamp archives in the Technology section. I do not link here because the DT site is regularly reorganised.

You may need to register with the Telegraph to access these pages, but it is free.  


http://www.telegraph.co.uk/


Conclusion


The hardcopy already distributed to army chaplains was produced with the help of the Draughtsman and the Repro. Unit in Colchester Garrison- I thank them, as I thank the Repro Unit in Arborfield Garrison, who have continued the work. This website has been put together with the help of my son, Luke who was 15 when we began, and to whom I extend my grateful thanks.


I also offer my thanks to those members of  Christians on the Internet (COIN) who are continuing to offer advice on the development of this site.  


I particularly thank The Reverend Alan Jesson for his encouragement, not least because he is the membership secretary of COIN www.coin.org.uk and would love to sign you up, but also because he is a Chaplain of the Army Cadet Force, and a long standing member of the RAChD. 


I thank  the Andrew Leach, Webmaster of Christchurch, Eastbourne  www.xpeastbourne.org  for his support and encouragement. He has produced a superb set of parish booklets which all should view, and carefully note.  The booklet style will adapt to many styles of worship.


I thank most especially Simon Kershaw, webmaster of the Ely Diocesan Site www.ely.anglican.org  and UK editor of Oremus for making webspace available on the Oremus Server for this Labarum Collection. This site started out as www.labarum.uni.cc where it may still be accessed, but is now a section of  An Anglican Liturgical Library at http://oremus.org 


I offer these texts freely and without any warranty. I am only too aware of the imperfections; but I hope they will assist you in your ministry.  Please use this resource freely while respecting copyright law. 


Brian Elliott CF

Liturgical Adviser, 

Royal Army Chaplains Department.


labarum@newpost.org


The black and white clipart on this page may be downloaded free from

www.hlyspirit.org.uk


 Raising the Standard of Liturgical Practice

 Resources for Common Worship and Common Witness

The Royal Army Chaplains' Department

Oremus Home               Labarum Home